Tuesday, April 28, 2020

Adorable Baby Card

Hi Everyone:
I made this baby card for a special baby I have not met yet.  I made it during a ZOOM crafting meeting last Friday.  It was so much fun!  We had a ZOOM meeting and everyone made a card.  At the end of the meeting everyone showed the card they made.  Thanks Sandy for setting up this unique crafting experience!

I saw a card something like this in the Mini Catalogue.  I did not copy it exactly but loved the look of it.  When I am having trouble getting my creative juices flowing I usually flip through the catalogue.  When I first started as a Stampin' Up! demonstrator 16 years ago the catalogue was called the "Annual Catalogue and Idea Book".  In recent years they have dropped the "Idea Book" part of the title even though it is still full of ideas.

Recipe

  • Cut a cardbase 5 1/2 x 8 1/2 and score at 4 1/4
  • Cut a piece of patterned paper 4 x 5 1/4 and adhere it to the front of the card.
  • Cut a piece of cardstock that matches the cardbase 3 3/4 x 5.  Using the Layering Circles dies die cut the two circles as shown.  Then emboss the paper using the Big Shot and Subtles embossing folder.
  • On scraps of white cardstock stamp and fussy cut the images of the lamb and bunny.  Colour them.  Position them in the holed and adhere them to the coloured cardstock using glue dots.
  • Put lots of Dimensionals on the back of this cardstock to pop it up off the patterned paper.
  • Punch or die cut a circle.  Stamp the sentiment with black ink.  Stamp the flowers with pink ink and the leaves with green ink.  Put Dimensionals on the back and adhere it to the card.
  • Cut out a piece of white cardstock and adhere it to the inside of the card.

Supplies I Used

  • Petal Pink cardstock (146985)
  • Petal Pink ink (147108)
  • Pear Pizzazz ink (147104)
  • Black Memento ink (132708)
  • Whisper White cardstock (100730)
  • Stampin' Blends
  • Dimensionals (104430)
  • Gingham paper (retired)
  • Layering Circles dies (151770)
  • Welcome Easter Stamp Set (151559) retiring
Need Supplies?  Click here

If you need ideas browse through the catalogue.  Have fun creating!

Monday, April 27, 2020

Thank You Card

Hi Everyone:
It was a beautiful sunny day here today!

This card was made with my last blog post in mind.  I love this layout.  I use it for many occasions.  It is simple yet stunning.  The Designer Series paper does all the work for you.

Recipe

  • Cut the cardbase 5 1/2 x 8 1/2 and score at 4 1/4
  • Cut two pieces of white cardstock 4 x 5 1/4.  One is for the front and the other is for the inside.
  • Stamp the sentiment using coordinating ink to the front of the card as shown.
  • Adhere the white cardstock with the sentiment to the front of the card.  Adhere the other piece of white cardstock to the inside of the card.
  • Cut a piece of cardstock that coordinates with the cardbase 3 1/4 x 3 1/4.
  • Cut a piece of Designer Series Paper 3 x 3 and adhere it to the 3 1/4 square cardstock.
  • Wrap ribbon around the square and tie in a knot or a bow.
  • Adhere the square to the front of the card using Dimensionals.

Supplies I Used

  • Poppy Parade cardstock (119793)
  • Whisper White cardstock (100730)
  • White Crinkled Seam Binding ribbon (151326) retiring
  • Peaceful Poppies Designer Series Paper (151324) retiring
  • Peaceful Moments Stamp Set (151595)
  • Poppy Parade ink (147051)
  • Dimensionals (104430)
Need Supplies?  Click here

Cards are a great way to express our thanks and love during this social / physical distancing time.

Be thankful and keep stamping!


Sunday, April 26, 2020

Gratitude

Hi Everyone:
It has been a few days since my last post.  I have been very busy with a few things I want to share with you today.

Saturday I spent the day participating in a virtual card making retreat put on by five Stampin' Up! demonstrators from the States.  Every hour on the hour one of the demonstrator showed a card making technique.  The retreat was 12 hours long.  It was amazing!  I learned so many fantastic ideas and will be using them in my card making the next few weeks.  The final hour was a Mystery Card.  All participants made a card at the same time using the clues the demonstrator presented.  Wow!  That was fun!  I am so thankful to these demonstrators.  They are holding another virtual retreat in July.  I also learned some ideas to reach out to you and keep you stamping.  Stay tuned!

The title of this post leads to the next item I want to talk to you about today.  A friend and I were "chatting" on messenger the other day.  She mentioned a free course Yale University is offering on well-being.  The words "free" and "well-being"piqued my interest.  Well long story short, I enrolled in the course called, "The Science of Well-Being".  I finished Week #1 in a day!  One of the activities I had to do is a Signature Strengths Survey online.  One of the concepts discussed what that if you link your signature strengths to your job or hobby or life you will be happier.  I had no idea what my signature strength was until the website spit it out - GRATITUDE!  The definition they gave was, "being aware of and thankful for the good things that happen; taking time to express thanks".  At first I was very surprised.  Then I thought more about it.  Maybe that is why I feel such joy when making and sending cards.  I was energized and ready for the all day retreat I wrote about above.

A note on this survey - they give you a print out listing your Signature Strengths in order.  For a chuckle for those of you who know me here are my top four:

  1. Gratitude
  2. Prudence
  3. Love of Learning
  4. Fairness
Bravery and Self-regulation were my bottom strengths.  I think those strengths dropped since I retired.  I don't need them as much anymore.

I will have a card to share with you tomorrow.

Keep stamping!


Thursday, April 23, 2020

Good-bye to Colourful Seasons Stamp Set and Dies

Hi Everyone:
Another one of my favourite stamp set and dies is retiring - Colourful Seasons.  I love this stamp set because it has images for all seasons and beautiful sentiments.  The dies are fun as shown in the framed piece above.  I copied this idea from Steph VanDorp.  I made this decor piece for Canada's 150th Birthday for the participants of an All-Day Crop I held in 2017.  Lots of fun!

The cards below demonstrate the beautiful sentiments.  Both sayings are pertinent at this time to send to a friend.


Supplies

  • Colorful Seasons stamp set (143726) retiring
  • Seasonal Layers dies (143751) retiring

If you like this stamp set and dies, click here to visit my website.


Capture the Good Stamp Set

Hi Everyone,
The Last Chance (Retiring Product) List came out today.  Capture the Good Stamp Set is among the products that are retiring. As a person who takes a lot of pictures, I love this stamp set.  It is great for card making as well as using on your scrapbook pages.

Recipe

  • Cut a piece of Basic Black cardstock 4 1/4 x 11.  Score at 5 1/2 and 2 3/4.
  • Fold the card in half along the score line and then half again on the score line to make a Z-fold.
  • Cut a piece of Designer Series Paper 4 x 2 1/4 and adhere it to the front of the card.
  • Cut a piece of white cardstock 4 x 2 1/4. Stamp the camera image using black ink.
  • Cut a piece of yellow cardstock 4 1/4 x 2 3/4.  Adhere the stamped camera image to this piece of cardstock.
  • Stamp the words "the focus is all on you" on a scrap of white cardstock using black ink. Punch it out using a 1 1/2" circle punch. Sponge around the circle using yellow ink using a sponge or dauber.  Adhere this to the front of the camera using Dimensionals.
  • Adhere the yellow cardstock to the front of the card keeping in mind that only half of this piece is adhered to the card front.
  • Cut a piece of white cardstock 4 x 5 1/4. Stamp the sentiment "it's your day" to the bottom right hand corner using black ink. Adhere to the inside of the card.

Supplies I Used

  • Capture the Good stamp set (150388) retiring
  • Basic Black cardstock (121045)
  • Whisper White cardstock (100730)
  • Pineapple Punch Classic ink (147141) retiring
  • Pineapple Punch cardstock (146971) retiring
  • See a Silhouette Designer Series Paper (149443) retiring
  • Memento Black ink (132456)
  • Dimensionals (104430)
  • Dauber (133773)

Need Supplies?  Click here

Tuesday, April 21, 2020

Simply Beautiful Cards

Hi Everyone,

Welcome to my blog.  I am so excited to share my love of card making with you and ignite your creativity.  I am an Independent Stampin' Up! demonstrator.  I will be using Stampin' Up! products.  Feel free to use whatever products you have.

During these uncertain times we all need a distraction or a break for our own mental health and stress.  Card making allows you to create or copy beautiful cards.  Remember the excitement you feel when you receive a handmade card in the mail?  Give someone that same feeling and let them know that you are thinking of them.  Some of my friends just make cards and keep them for themselves.  Either way card making brings joy to you and the world.

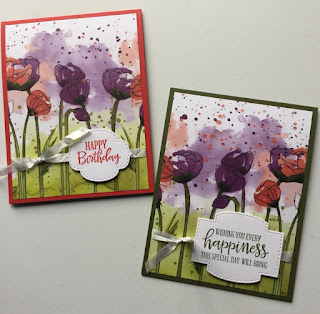
I want to highlight these simply beautiful cards.  The Designer Series Paper does all the work for you.  The paper is the wow in this card.

Recipe

  • Cut a coloured card base measuring 8 1/2 x 5 1/2 and scored at 4 1/4.
  • Cut a piece of Designer Series Paper 4 x 5 1/4. 
  • Wrap ribbon around the DSP and tie a bow. 
  • Stamp sentiment in coordinating ink.  Cut out and adhere to the card using Dimensionals.  
  • Cut a piece of Whisper White cardstock for the inside of the card 4 x 5 1/4 and adhere to the inside.

Supplies I Used

  • Poppy Parade for the card on the left and Mossy Meadow for the card on the right
  • Peaceful Poppies DSP (151255)
  • Whisper White 1/4" Crinkled Seam Binding Ribbon (151326)
  • Dimensionals (104430)
  • Sentiments from Peaceful Moments stamp set (151595) 
  • Stitched So Sweetly Dies (151690)
  • Whisper White Cardstock (100730) for inside and sentiment
Need supplies?  Click here